Saturday, June 30, 2012

Busy Weekend!

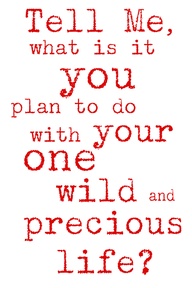
Picture Quote of the Week

Hey all this week has been crazy and it's only getting more crazy and busy! Miss Mel is coming back from her glorious Floridian vacation today! Tim, Miss Heather's bf, came down to Springfield to see Miss Heather for the weekend. The best part is he is going to bring her back to St. Louis so she can be reunited with Miss Mel for a whole week! Score! On a more sad note, Miss Heather's lovely roommate, Madison, moved out yesterday (tears have been shed). Luckily another awesome person is moving in, our beautiful friend Raven! So as you can see it's been ridiculously busy!

The new and old roomies going out for one last hurrah! 
Raven Miss Heather and Madison
 The lovely ladies who have been getting their tan on in Florida all week!
Miss Mel Bosch and Ellen

Miss Mel is constantly yelling at Miss Heather for not wearing a helmet while biking and she found a number of cute hairstyles for helmets so Miss Heather has no excuse anymore. Darn!

Here are some fun sea shell decorating craft ideas that we'll have to try out soon!

Hope you guys have a great weekend, I know we will! 

-Miss Mel and Miss Heather

Thursday, June 28, 2012

Modcloth Love

So Miss Mel and I have referred to the online clothing store ModCloth before but I just want you guys to really understand just how awesome and beautiful it is! They started out as one girl selling vintage clothes she found, from thrift stores, from her dorm room and now they're this huge online clothing store. Basically every thrifter's dream right? 

I'm beyond obsesses with their swimsuit styles!

They have the cutest dresses!
This would be perfect for a dinner date!

Did someone say floral wedges?

The clothes they sell now always have a very vintage or retro look to them to keep to their roots. Miss Mel and I just can't get enough of ModCloth and hope you love them just as much!

-Miss Mel and Miss Heather

Wednesday, June 27, 2012

DIY: Crossbody Purse

Hey I made a crossbody purse and here's how I did it!

Supplies I used:
Yarn
Fabric (jean, cotton, and some liner)
Wooden beads
Embroidery needle

1. Measure how big you want the purse to be then  sew them outside sides facing each other, making sure to leave the top open. 
2. Next step is to make the strap for the purse. I took about 8 pieces of yarn as long as I wanted the shoulder strap to be and fishtail braided them, occasionally throwing on wooden beads.
I found the best way to weave the beads onto the yarn was using a bobby-pin.

3. You will take the two piece of fabric you sewed separately and fold them into each other, the inside sides of fabric facing each other with the outside fabric on the inside. You will fold over about an inch over the edge so the outside fabric is seen. Pin the ends of your yarn shoulder straps to either end then sew around the fold. I went over the fold twice.
After sewing you'll need to add the clasp, in an area where the jean flap will cover it.


4. Next you'll measure from side to side to see how wide your flap should be then cut out the size you want in the jean fabric. You will also need to cut out the same size in the fabric you used for you liner. Pin those together, outside sides facing each other and sew three of the sides, leaving the top open. Add your magnetic clasp through the lining.

5. You'll need to sew the top (unsewn) part to the isde of the purse so that it hangs over the front

6. To add a little more color, I embroidered a few circles around where I put the magnetic clasp ont he jean flap.

Then you're done!

I made my purse just big enough to carry the essentials like my phone, keys, wallet and headphones. I love purses I can just throw over my shoulder! 

-Miss Mel and Miss Heather

Tuesday, June 26, 2012

Tropical Storm Debby

So as you know from my last two posts, I am currently in Destin, Flordia with two of our friends, Ellen and Bosch. If you've been watching the news then you know that tropical storm "Debby" is right smack-dab all up on us. Geez, Debby. I'm currently writing this post after being on the beach for a brief moment of sunshine from 8:00 until about noon. Don't worrry though, we'll find plenty of activities to do! Everyone is safe and sound but hoping for sunshine instead of rain! Oh, Debby, excuse my language, but you're a bitch. -Miss Mel and Miss Heather

Monday, June 25, 2012

DIY: Mason Jar Candle Holders

Hey friends this weekend I reused some old pasta jars and made them into candle holders. I made little messages by painting over letter stickers on the jars. Here's what I did!


Supplies I used:
Mason Jars or old pasta jars
Paint and paintbrush
Modge Podge (Gloss finish)
Letter Stickers
Painter's Tape
Newspaper
Yarn
Candles

1. First I spelled out the messages I wanted on the bottles (I spelled out "Take my hand" and "Home is with you"). Then I used the painter's tape to make fun designs on the bottles.

2. Next step was to lay out the newspaper and paint the bottles!
3. Once the paint had dried, I painted a thin layer of modge podge to give the glasses a glossy look to them instead of matte. 

4. After everything had dried I peeled off the painter's tape and letter stickers. I filled the jars up with some colored water and put some tea light candles in the jars. Last touch was to tie some yarn on and they were finished!

I love these little candle holders! They would be great in a centerpiece on the coffee table or on a kitchen island. Have fun crafting!

-Miss Mel and Miss Heather

Saturday, June 23, 2012

Oh hey there weekend!

Yay! The weekend is finally here and we couldn't be happier! These next couple of weeks are going to be jam packed with activities! For instance, Miss Mel left for Florida yesterday with our friends, Ellen and Bosch, and Tim, Miss Heather's boyfriend, will be visiting her and bringing her back to St. Louis for a whole week and 4th of July celebrations will be happening! Like I said, jammed packed with activities! But for now, let's focus on the week ahead.

Picture quote of the week.
I think this is the very definition of Miss Heather and I.

I want this romper so badly.

Thanks to Tom for sharing!

This will be me on the beach
heheh

I will be attempting to be following this packing list while packing for Florida.
We shall see how it goes...

Lastly, a song to brighten up your weekend. 

It's officially summer people!

-Miss Mel and Miss Heather

p.s. Three other posts you might like...

Friday, June 22, 2012

DIY: Koozies

Today is a glorious day! 
Why's that you ask? 
Because I'm leaving for Florida with Miss Heather and I's good friends, Ellen and Bosch. 
*I wish Miss Heather was coming but, alas, it wasn't possible!*
Anyways, since we are crazy crafters we decided to make our own koozies for the trip! 

Our finished project!
From left to right: Ellen's, Miss Mel's, Annie's and Bosch's koozies!

Here's how we made them. 
(I apologize for the picture quality! We were working outside and it was getting dark fast!)

Supplies
*Feel free to use all listed below or to pick and choose your favorite items!*
Plain foam koozies found at Hobby Lobby, the Dollar Store or Wal-Mart
Colored foam sheets
 Cloth
Ribbon
Gems
Foam letters
Hot Glue Gun
Modge Podge
Paintbrush

Step One
Take your koozie and select either to cover it with a colored foam sheet or cloth. 
Use either the hot glue gun or Modge Podge to stick it to the koozie. 
The reason I say use either the hot glue gun or Modge Podge is because we each had a different method of assembling our koozies. 
 I personally found that using the Modge Podge worked better with the cloth and using the hot glue gun worked better with the foam sheets. 
*Be careful though because we found that the hot glue gun was slightly melting the foam!*

Step Two
Take a piece of ribbon and hot glue it around the top of your koozie to give it a finished look. 

Step Three
Add any other embellishments you choose! Such as, adding a foam letter with gems, hot gluing down a bow, placing gems on the back, whatever you want!

Step Four
Show off your work!
Notice that Annie's (third from the left) has gems on the back to look like buttons! Super cute!

Ellen's and Miss Mel's


I can't wait to use mine!

-Miss Mel and Miss Heather

p.s. 
I made one for Miss Heather yesterday that she can have when we are reunited in the next couple of weeks!


p.p.s.
Did you know that woozies a.k.a. wine koozies were a thing? Hah!

Thursday, June 21, 2012

Pretty Little Liars

So confession time one of Miss Mel and I's guilty pleasures is the ABC Family show called "Pretty Little Liars". It's based on these four high school girls who are being harassed by some anonymous person they only know as "A". This "A" knows all their secrets and uses them to manipulate them into doing his/her bidding or even to turn them against each other. 


This is a common scene where A is texting them


Each girl has a crazy story behind them whether it's dating a teacher, discovering their sexuality, or dealing with image issues you can't help but get sucked into their lives!

From the left there's Hanna(Ashley Benson) Emily(Shay Mitchell) Aria(Lucy Hale) and Spencer(Troian Bellasario)

The situations these girls get into are quite ridiculous and sometimes unbelievable yet I keep finding myself coming back for more! I can't get enough and now that it's summer break I have all the free time in the world to dedicate to catching up with the latest scandal. What are some of your guilty pleasures?

-Miss Mel and Miss Heather

Tuesday, June 19, 2012

Summer Bucket List

Miss Mel and Miss Heather's Summer Bucket List

Miss Mel and Miss Heather in Hilton Head, South Carolina last summer.
1) Make Sangria

2) Go backpacking
*We are planning to do a one-night backpacking trip with our friends soon!* 

3) "Hair Chalk" our hair and it have it be successful

4) Complete a 5K
*Color Run here we come!*

5) Do yoga on a regular basis

6) Become a champion "kayak-er"
*Miss Mel just bought herself an inflatable kayak to get herself started!*

7) Become a "bronze beauty"

8) Read LOTS of books
*Especially, finishing the "Game of Thrones" series. I'm on Book 3!*

9) Go camping

10) Be reunited with each other!
*Since Miss Heather and I live three hours apart from each other, we relish in every opportunity that we get to see one another!*

Do you make a "summer bucket list"? If you do, what's on it? Miss Heather and I would love to know!

-Miss Mel and Miss Heather

Monday, June 18, 2012

Style Icon: Rachel Bilson

Miss Mel and I were totally in love with the T.V. show, "The O.C.", so this week I decided to talk about Rachel Bilson. She played the lovable Summer Roberts who had an ongoing love affair with Seth Cohen, played by Adam Brody. We basically loved Seth and Summer!

She collaborated with Steve Madden and Nicole Chavez to create the awesome shoe store "ShoeMint". Just look at those awesome shoes!

This is the infamous Seth and Summer kiss from "The O.C." 
You would have had to watch the show but it's so cute!

She's  even tried her hand at being a stylist, many people call her a "fashion junkie" and I totally believe it!


We just love her! Who do you guys just love? Let us know!

-Miss Mel and Miss Heather


Saturday, June 16, 2012

Have a good weekend!

What are you guys up to this weekend?


How to do a braid bun. Super easy and chic!

I kind of want to try Lauren Conrad's Bikini Boot Camp....


I used our shoe box transformation idea to organize my purses!

Lastly, a song I've had stuck in my head.

Have fun this weekend!

xoxo
-Miss Mel and Miss Heather

Friday, June 15, 2012

A Glimpse of Our Week!

Hey lovely readers!
Here are some photos from the past couple of weeks that Miss Heather and I would love to share with you!


*From left to right: Our friend Ellen at a Six Flags event, Our friends, Bosch and Ellen, at the St.Louis Botanical Garden's free concert series (check out our awesome set-up!), Tom and Sass, A buffalo and a baby buffalo at Lone Elk Park, Bosch and Ellen at the Six Flags event on the carrousel, Yummy funnel cake, Miss Heather and Sass, Bosch, Anne, Ellen and Ana at the Botanical Gardens, Miss Heather and Sass and lastly, Tom enjoying pizza at our favorite pizza joint in Rolla, MO, "Alex's Pizza". *
Side Note: Notice all the photos with little Sass? Haha!

-Miss Mel and Miss Heather

p.s. I made this collage using Picasa a free photo editing program through Google! It's seriously so easy to use!
You can download it here.

Thursday, June 14, 2012

DIY: iPad Envelope

I really liked this bloggers idea on iPad or notebook sleeve and tweaked it to come up with this cute iPad envelope "sleeve"! Here's how I made it!

Ingredients:
Outside fabric (I used cotton)
Inside Fabric (I used fleece)
Sewing machine and needle and thread
Elastic string
Scissors
Ruler
Button

1. First I measured the iPad and drew a rectangle onto my fabric. With my ruler I measured out the flaps attaching to the rectangle.

2. I cut out the shape then pinned it to the second, outer sides facing each other, the cut out the second piece.

3. For the elastic string I used a hair tie and pinned it to the top corner with the big loop on the inside.

4. I sewed along the edges but left about three inches open so I could flip it inside out. Then hand stitched the hole shut.

5. Next I hand stitched the bottom three flaps together. I would recommend ironing the folds in the fabric before doing this step to make it easier on yourself.


6. When sewing on the button make sure the elastic string will be able to reach it. Then sew.

Then you're done!

I love this little thing! You can always change the measurements to fit a Kindle or Tablet etc etc. I don't actually own an iPad but I made this for my boyfriend so he could have something to store his iPad in while traveling and such! Have a great day!