Hi friends! Hope you all had a fabulous weekend! I know Miss Mel and I did. I'm back again to show you my latest crafting endeavor, name banners! Really they don't have to be your name, they could be any message you want to proclaim but I decided to spice up my room with a fun "name tag".
Here's the one hanging in my room but I'll backtrack and show you how I got here.

1.Here are the supplies I used:
- Construction paper
- Yarn or a thick, sturdy string
- Markers and/or pencil
- Glue stick (I would not recommend liquid)
- Clothespins and pushpins/nails
- Exacto knife and cutting surface

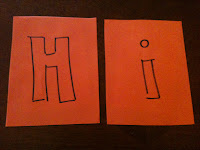
2. First I took the paper I was using as the background and folded it into four equal-sized squares and cut them. You'll need a square per letter, I cut out seven for my name. I then cut out seven more smaller squares in a different color. Altogether I had 14 squares in the end.
3. For my name banner I wanted to decorate it a tad more so I took a brown marker and drew stripes on the larger red squares. For my tutorial I decided to decorate the smaller yellow squares with brown polka dots. After the marker had dried I glue sticked the small squares to the big ones.

4. The next step was to outline the letters. I decided it would be smarter to draw the letters on the back so that way when I cut them out there wouldn't be any remnants of pencil markings on the front side. The only thing I have to say is make sure you remember to flip the letters on the back since you'll be cutting backwards and the letters will be mirror images when looking at the front. Maybe use a stencil! Next step is to use the Exacto knife or blade to cut out your letters.

5. All that is left is cut a long enough piece of yarn to fit the letters and pin them on. Find somewhere to hang the banner and use the pushpins or nails to hang them on your wall and enjoy!
What better way to welcome the newest member of our family than to make Sass her very own banner!

Miss Mel and I hope you all have a great week!
-Miss Mel and Miss Heather
No comments:
Post a Comment